For people that don't read my blog, here is a copy:
I read on the Arduino forum about using cheap Nokia data cables as a FTDI cable. I decided to have a look and started to shop around for a compatible cable. The best candidate seems to be the CA-42 USB2.0 Nokia Data Cable and I ordered this one:
http://www.dealextreme.com/details.dx/sku.45715 from Deal Extreme for $4.40 with free shipping. It comes in a box with a driver CD, so you don’t have to browse all over the internet to find drivers.
This is how it looks like:

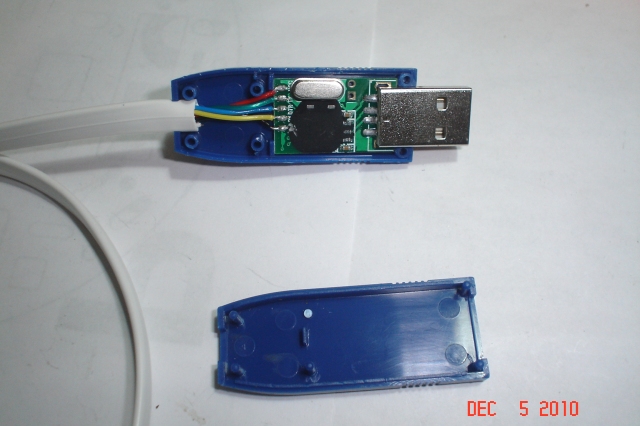
The nice part of this cable is that the blue plastic casing is not glued, so with a knife I pried it open. Inside, I found a small PCB with a black blob and… lucky me, the pins are already labeled! It has GND (the label is covered by the blob), Rx, Dtr, Tx and Vcc.

Only GND, Rx and Tx were used, so I needed to ditch the original cable and make a new one. For this purpose I bought a 6 wire phone cable, about 2 meters long (good for 3-4 cables) for $1 and some crimp pins and 6 pin housings, $0.40 a set.
I stripped one end of the phone cable and there were 6 colored wires: white, black, red, green, yellow, blue. I need only 5 wires, so I cut off the white wire. Then I crimped 5 pins on the remaining wires and I plugged them like this (from left to right):
Blue - Dtr
Yellow – Tx
Green - Rx
Red – Vcc
nothing
Black - GND
Then I stripped the other end of the cable, cut off the white wire, then started to solder the remaining wires in order (from left to right):
Black - GND
Yellow – Rx
Blue – Dtr
Green – Tx
Red - Vcc
The Dtr pin on the little board had a red wire jumper to a pin on the back of the board. I removed that wire before soldering the Blue wire instead. When soldering the Rx and Tx wires you need to be careful and switch them, so the Rx pin from the microcontroller will go to the Tx pin from the FTDI chip and the Tx from the microcontroller will go to the Rx pin from the FTDI chip.
This is how the cable looks now:

Then I placed the little board back in it’s plastic casing and closed it.
The only thing that is missing are the Rx-Tx LEDs, but we’ll live without them.
Before I can use the cable I need to install the driver. I put the CD in and browsed the folders to find a Windows 7 compatible driver. I didn’t, but I found a Vista driver and installed that one. After the install finished, I plugged the cable in the USB port. New hardware was detected and the driver loaded. It was detected as "Prolific USB-to-Serial Comm Port" and it had allocated the COM8 port.
Will Arduino IDE work with it? Let’s see. I took a µBotino board and plugged the cable in the FTDI header. The power LED came on (the cable supplies 5V) and the already loaded Blink program started to run. So far so good. I started the Arduino IDE and loaded a random Example sketch, selected the serial port COM8 and clicked the Upload button. The pin D13 (red) LED flickered for a moment and then went off. After a little bit, the “Done uploading” message came in the IDE, so I was sure the uploading was done. The Blink sketch was not there anymore, because the D13 LED wasn’t blinking. I loaded the Blink sketch in Arduino IDE and clicked on the Upload button, then, after seeing the “Done uploading” message, the D13 LED started to blink again! Success!

As you can see, this is an easy and cheap way to make your own FTDI cable and you can use it as a USB-serial cable for any project you have.
I might be selling these cables in my store for about $10 if people are interested.

