
 Search Here
MISC
Parts List
Robot Forum
Chat
Member Pages
Axon MCU
Robot Books
Shop
Contact
SKILLS
How To Build
A Robot
Tutorial
Calculators
Mechanics
Programming
Miscellaneous
Robots
Space
HARDWARE
Actuators
Batteries
Electronics
Materials
Microcontrollers
Sensors
SCIENCE
Robot Journals
Robot Theory
Conferences
- coats your components to preventing rusting and shorting
- fills the cracks in the seal to keep water out
- applies a counter pressure for deep dives
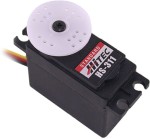
Servos
The hobby servo in the last 5 or so years has become extremely popular
amoung robotics builders. They are cheap and easy to use, but there is one issue with them - they
aren't waterproof. Despite what some people claim, servos are only water-resistant.
This means that splashing water on them occasionally is fine, but full water immersion is like drowning
cute kittens (very bad). This tutorial will list several popular ways to waterproof servos, then I will
go into the best method (the SoR method) towards the end of the tutorial.
Servos are Only Water Resistant
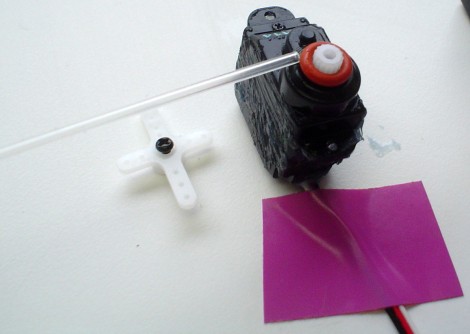
Taking apart a standard servo you will quickly notice thin rubber rings around the edge, as shown here:
These rings are there for near water-tight seals. Your main concern for water entering your servo is actually at the output shaft. Sealing the output shaft is always the most difficult part when waterproofing motors, and people do crazy things like magnetic coupling, etc. But as a hobbyist, using the most cherished of robot actuators (the servo, cough), we will have to do this low budget. But note, when I say low budget, I also mean very reliable . . .
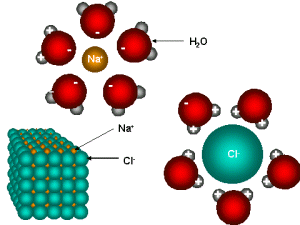
Electrical Resistance of Water
The very first question you should be asking yourself is what type of water your robot will
operate in, as it will make a huge difference in your design.
Pure water is a near perfect electrical insulator - meaning that it conducts electricity very very poorly. If you were to drop your computer into a tank of pure water, your computer will still work! So why is water normally bad for electronics? This is because in water there are impurities called ions, such as sodium or chlorine or whatever, that transfers electrons.
The first type of water you can use for testing your water exploring robot is called de-ionized water. This water type, cheaply available at less than $15/gallon, has been purified so that it acts as almost a pure insulator. Suppose you are building a robot that travels underwater and you are seriously worried about waterproofing and frying your expensive equipment. If you dont plan for it to go outside the lab, it may be cheapest/easiest to buy a few gallons of de-ionized (de-io for short) water and just let all your electronics get wet. It may seem odd, but remember, pure water is not conductive and will not harm your electronics.
The next type of water you will probably be involved with is either freshwater or tap water. Although this type of water is still considered an insulator, it can conduct electricity to an extent. To find out how conductive the water is, get out your multi-meter with probes and measure the electrical resistance. Measuring my tap water with my probes at a distance of 1" apart, I get 70K-ohms (a lot!). Technically you can run non-sensitive electronics, including batteries and motors, in this type of water with no problem. However there is one issue you must be aware of - ions dont just conduct electricity, they also facilitate rust. You may not have to worry about shorting your circuits, but you must take care to make sure everything is rust proof.
There is one last type of water, and that is sea water. Sea water, being as salty as it is, contains a very large percentage of sodium ions. This makes sea water highly conductive, at just a few K-ohms (Ill measure this when I get the chance). If your robot will be involved in sea water, take every waterproofing precaution possible.
Water Pressure
The next issue to consider is water pressure. Deeper your robot goes, higher the
pressure being applied to the components. Too high and stuff breaks.
But that isnt the only issue! Consider the pumping action caused by the change in pressure.
The squeezing and expanding motion of
changing pressure will slowly cause water to leak in through the tiny cracks of your imperfect seal.
With each dive, your components will slowly accumulate water.
The good news is that there is a solution to both of these problems. This is to fill all of your components with oil. Wha?!?! Yes, the non-conductive oil does these three things:
I will talk about oil later in this tutorial.
Waterproofing Your Servo
Waterproofing a servo isn't hard. However it requires
high reliability, as the tiniest mistake can be very costly. Below I will list all the methods
I have seen to waterproof a servo, and then I will talk about the SoR method for waterproofing
servos. You can also mix and match some of the methods . . .
The Balloon Method
One common method of waterproofing servos that I have seen is the balloon method.
All you do is take a servo, put it inside a balloon, and pray that water doesnt go into
the hole that the shaft sticks out of.
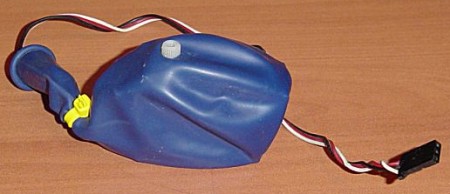
This method may work for snow proofing, but definitely not water. Moving on . . .
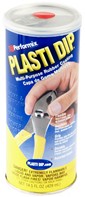
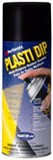
Plasti-Dip Method
The Plasti-Dip method is slightly better than the balloon method, but it still leaves
the output shaft vulnerable to water leaks. Plasti-Dip is a product you can buy
that comes as a gooey liquid that you can dip your components in. Let it dry, and
it forms a soft layer of plastic over your part.
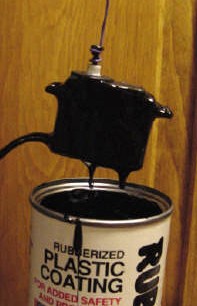
This is what it looks like, coming in either sprayable or dipping form:
Dipping the servo in (left), and the servo after drying (right).

An unrelated comment about Plasti-Dip. A few years ago I discovered Plasti-Dip for another application: making parts high friction. You can add rough contaminants to the dip, such as fine grain sand, to give your dipped parts a hard rough coating. This would be useful if you were building a robot that required friction, such as claws on a climbing robot . . .
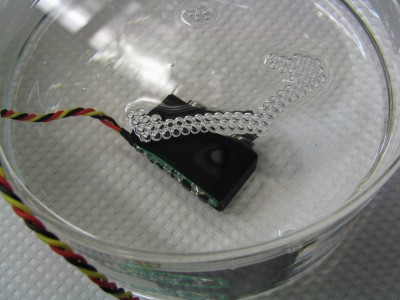
The Water Tight Box with Push Rod Method
This method can be reliable, if done right. Basically what you do is build a waterproof
box to incase the servo. The servo shaft then exits by use of something called a
rubber boot (also called a rubber bellow - if interested in buying them,
searching for this term will yield better results).
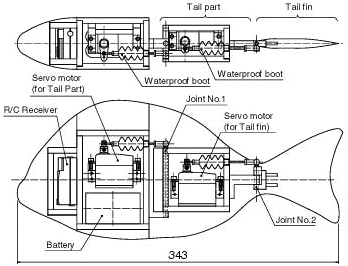
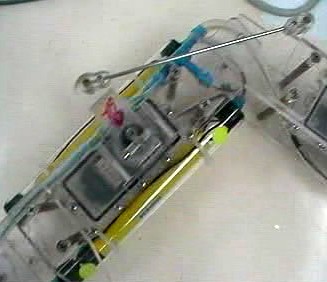
The waterproof boot is shown in this typical robot fish diagram below (no, this is not the robot fish I am working on!!!). The zig-zag lines represent the rubber boot, both attached to the box, as well as the moving servo shaft. You can also see the two servos in the design.
Here are more images of a servo in a transparent box, with a servo arm sticking out of it. I took these images from a blurry video of a robot eel. They dont use a rubber boot, but instead some other method I cant identify. Emailing the creators of the robot didnt yield any additional information =(
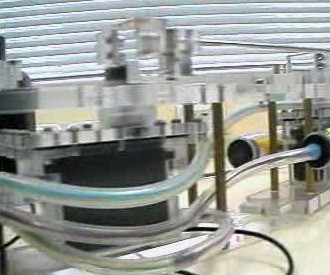
The problem with this method is that it is complicated, bulky, and requires precision-machined parts.
The Superglue and O-Ring Method (old SoR method)
This method is simple, but it had some problems that I will mention later.
Im mostly keeping this method listed so you can see how my ideas evolved.
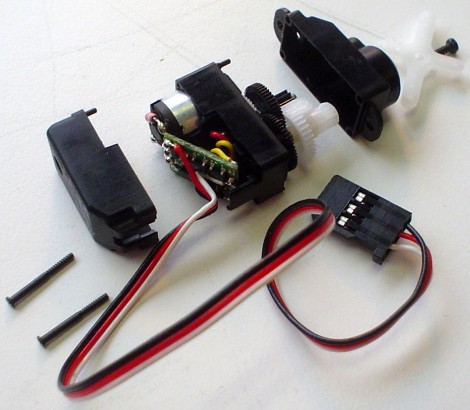
First, unscrew the servo so that it can open up the 3 major sections as shown.
Then superglue each section together, and re-screw it all.
Be careful not to glue the gears in place.
Also, put a lot of extra glue where the wires are, too.
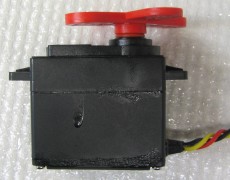
Then you get a pack of O-rings (usually 100 for $10) that are sized about 10% smaller than the servo output shaft diameter. Make sure the O-ring material is soft, so that it conforms well over the splines of the servo output shaft (the gear shaped looking edges). Then press the servo horn onto the output shaft, and screw that in. Finally, superglue that screw in place. Wallah, instant water proofing!
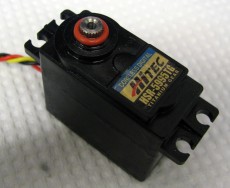
Waterproofed Hitec HSR-5995 servo, with red-colored O-ring (left), and attached servo horn (right):
You may also want to oil up the O-ring seal to reduce friction. Just get a sealant oil and apply it lightly to the O-ring. Make sure your sealant oil isnt the same material as the O-ring (for example, dont use silicone oil with a silicone O-ring).
Although untested, my intuition says this method is reliable for up to 10 feet depth.
Oil Filled Servo (old SoR method, continued)
Now there is an additional optional step you can perform before you do the superglue and O-ring
method. This is to fill the servo with a non-conductive oil. There are many types of oil
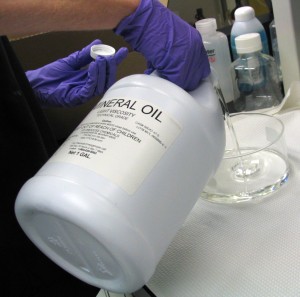
you can use, such as cooking oil, mineral oil, or silicone oil. I decided to use light viscocity mineral oil
because its cheaply available, but I never fully investigated which type of oil is best. I would
recommend using a heavy viscocity oil though, as it doesnt seep through small cracks in the seal.
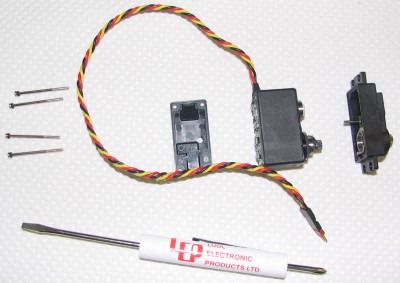
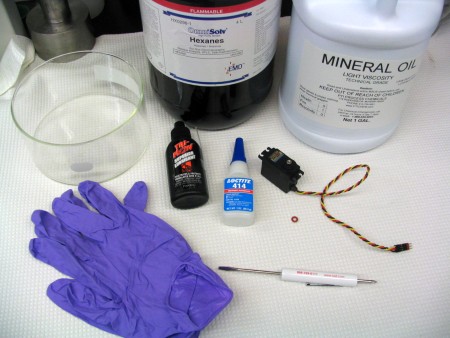
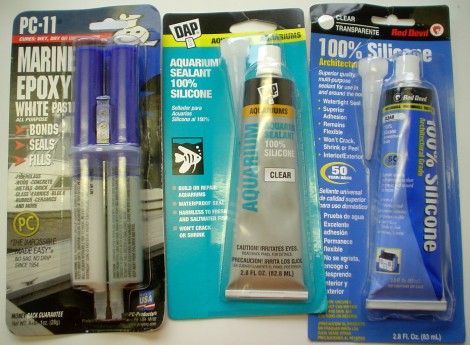
The first step is to get these items shown below. You need oil, a wide container that holds oil (I used a wide lab glass beaker), gloves, superglue (I used loctite 414, but I recommend something that dries in under 5 minutes), a screwdriver, and either acetone or hexanes. Tweezers are also recommended, but optional.
The first step is to poor the oil into your container. You want about one to two inches of oil. You may also want your container to be inside a second container, as I couldnt avoid spilling oil everywhere. Choosing a container that BOTH of your hands can operate in is very important.
Now you should disassemble your servo, and put all parts in the oil. Make sure you shake out all of the bubbles. In this image, the bubbles made pretty shapes that looked like self-forming molecular chains . . .
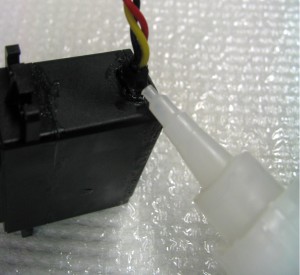
Not only did I try this on the standard sized servos, I also did it on a bunch of Futaba S3110 Micro Servos.
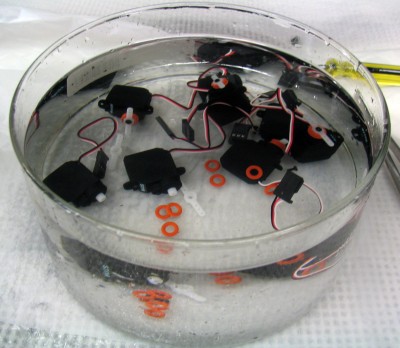
Ok now the really hard part - reassemble the servos while they are fully submersed in oil! Make sure you practice disassembling and reassembling the servo in air a few times before trying to reassemble in oil. Its 10x harder to do it in oil, so practice is good . . .
A few potential issues . . . I had trouble handling the tiny screws of the microservos while wearing gloves. Using tweezers to pick and place the screws saved me tons of time! The oil is also optically distorting, making it hard to see what you are doing. Make sure you have good lighting. For the microservos, I also used an overhead magnifying glass which helped somewhat. You might also have trouble operating the screwdriver, since your gloved hands are covered in slippery oil. Make sure you use a screwdriver with a good grip handle (a mistake I made).
After you get the O-ring and servo horn on, and you make sure the servo is screwed together really well, take the servo out of the oil and clean it off. To do this, dab it with a paper towel that is lightly soaked in acetone or hexanes (dissolves oils). Both give off fumes (especially hexanes) so do this under a fume hood or well ventilated area. Neither chemical damages the servo casing, but acetone can potentially dissolve the plastic gears and electronics, so be careful. Acetone can also dissolve screwdriver handles (yea, another mistake I made . . . ).
Lastly, apply superglue (that is designed for plastics) to all of the seals.
To verify that your seal is good, let the servo sit out for a day or so. Come back and if any oil is still leaking, clean it off and apply more superglue to that area.
Good Results (whew! those servos were expensive!!!)
Now for a video showing the servo fully waterproofed and in water. It was hard to see the
water in the camera, so I splashed it around a bit . . .
Correcting Mistakes, Other Issues
Superglue isnt that permanent. Acetone and hexanes will also dissolve the glue, making it soft
enough you can pick it off. If you mess up, you can use these chemicals to remove the glue,
but be careful not to get the chemicals inside the servo.
When waterproofing the HSR-5995 servo, I noticed the servo grease that was on the metal gears easily came off. I am not sure why, but perhaps the mineral oil can dissolve servo grease? This only happened with the grey servo grease for the Hitec servo, as I didnt have this problem with the white grease in the Futaba servos.
The biggest problem I had with this method is that the oil slowly leaked out of the servo casing. The servos still worked, but with the oil leaking out, it was only time until they failed.
This method also took a long time, because assembling a servo underwater is crazy difficult and superglue isn't all that reliable . . . Which brings me to the next method!
The Ultimate Waterproofing Method
This is my most recent and most effective method for waterproof. To summarize things up,
check out my videos:
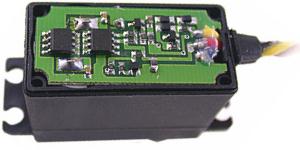
The first step is to open up your servo.
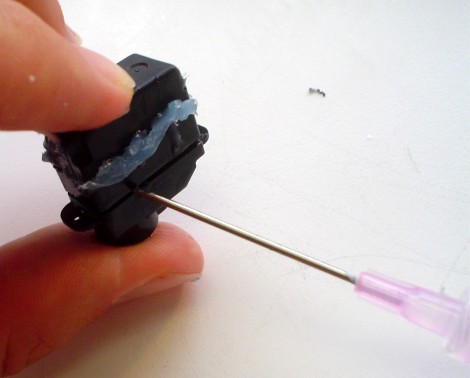
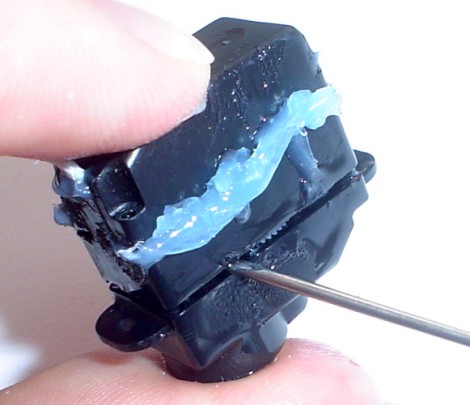
Now get some waterproof epoxy. Make sure its non-conductive!
Now place a big glob of the epoxy onto the circuit board.
Spread the epoxy around real well. This particular epoxy expands slightly when it solidifies.

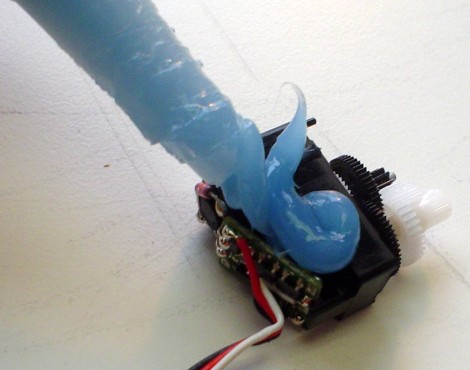
Now using a syringe, inject mineral oil into the gear casing. This is a little messy . . .
Fill it until its like 90% to the rim (the rest will spill out if you put more in).
Now after you put the O-ring onto the servo, put a little oil on it to reduce friction.
I like to tape the servo down so the epoxy can cure properly overnight.
Contact me to report your findings with any of these or other servo waterproofing methods!
Society of Robots copyright 2005-2014