
 Search Here
MISC
Parts List
Robot Forum
Chat
Member Pages
Axon MCU
Robot Books
Shop
Contact
SKILLS
How To Build
A Robot
Tutorial
Calculators
Mechanics
Programming
Miscellaneous
Robots
Space
HARDWARE
Actuators
Batteries
Electronics
Materials
Microcontrollers
Sensors
SCIENCE
Robot Journals
Robot Theory
Conferences

Hyper Squirrel
Hyper Squirrel was my first attempt at high-speed reactive mapping
years ago. And only taking 6 hours to build from start to finish,
its also the fastest I've ever built a robot.
Enjoy the video!
Hyper Sensing and Speed
My goal was to make a robot that can go as fast as possible, or faster,
and yet still make intelligent decisions based on a scanning sensor.
It worked really well, and ever since then I've had a personal affinity
for robots that are way faster than they perhaps should be =)
This is the first robot I built that used the Sharp IR rangefinder (read that tutorial to understand more of the theory) and wanted to put it on a scanning servo. I had never seen anyone do this before and thought it could be really useful for mapping. This is also the robot that I got the idea to add multiple rangefinders that scanned together to halve the required scan time. I have since achieved much more amazing algorithms with future robots (again, check the rangefinder tutorial), but I'd still like to share this design for beginners.
Algorithm
The algorithm was fairly simple - drive really fast. The scanner
would make measurements, and attempt to guess the angle of the walls/objects
in front of it. Then it would use
differential steering to try and
stay parallel to the walls. Closer objects related to sharper steering.
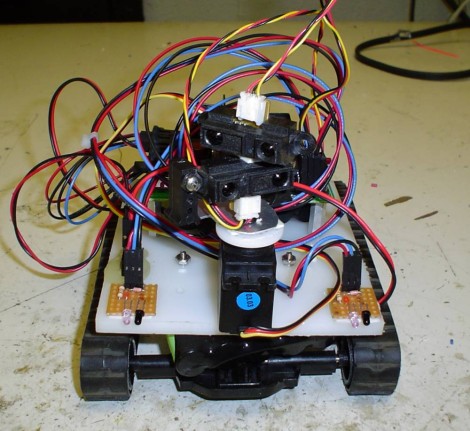
I put two additional short range infrared emitter-detector pairs on the front as a sort of bumper sensor (see above image, in the front of the robot, on the left and right sides). The bumper sensor had priority using subsumption style arbitration (the anti-crash sensor gets final say). You will notice this in the video when Hyper Squirrel backs up occasionally.
Chassis
This is also my first and only treaded robot I ever built. I was
wandering through a toy store one day and saw this cheap $15
made-in-china remote control toy called the Echo (sorry, but
I don't have a picture of it). It came with treads and looked
easy to hack, so I bought it and took it home.

The first step I took was to rip off the flashy car looking cover, then unscrewed the chassis. I needed to disconnect the two el-cheapo DC motors from the 27Mhz receiver (which I saved and used for a different project later) and attach them to my motor driver on my PIC-based Cerebellum microcontroller.
You can see the four motor wires coming out the back here:

Then I took a square shaped piece of HDPE (that white square plate on the robot), drilled a few well-placed holes in it to match holes I drilled into the Echo chassis, and used screws to fix it on. To attach my microcontroller, I used for metal spacers. I attached my 6V NiMH battery using Velcro right under the microcontroller (see above image).
The servo in front was attached using double sided sticky tape.
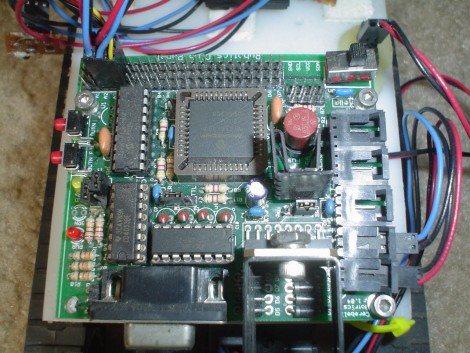
This is the Cerebellum board that was mounted on the robot:
A bottom view just for fun:

The whole chassis modding process took me about 5 hours. The rest of the time was used for uploading source code I modded from older robots I made.
Source Code
The code was written for the no longer sold PIC-based Cerebellum microcontroller.
It was designed for the PIC16F877.
Hyper Squirrel Source Code for PIC (May 2004)
Hypersquirrel with CMUcam: Bronto
I also tried putting a CMUcam on Hyper Squirrel to compete in the
MOBOT competition. I got it to work,
but apparently rubber treads and concrete pavement don't get along too well -
the robot had serious problems turning! Stoopid friction . . .
Anyway, I called in Bronto (short for Brontosaurus, that long-necked dinosaur).
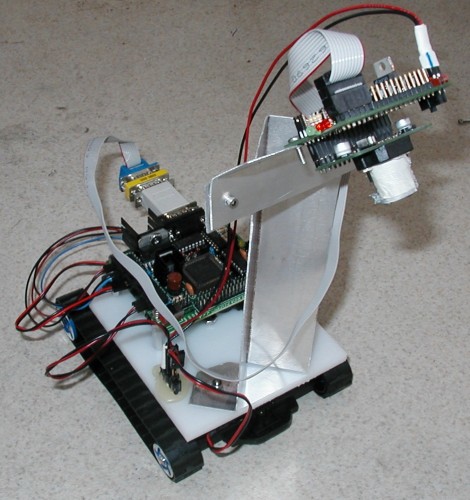
The CMUcam was attached using a sheet of aluminum that I folded and drilled a few times . . .

Society of Robots copyright 2005-2014