
 Search Here
MISC
Parts List
Robot Forum
Chat
Member Pages
Axon MCU
Robot Books
Shop
Contact
SKILLS
How To Build
A Robot
Tutorial
Calculators
Mechanics
Programming
Miscellaneous
Robots
Space
HARDWARE
Actuators
Batteries
Electronics
Materials
Microcontrollers
Sensors
SCIENCE
Robot Journals
Robot Theory
Conferences
Line Follow Robot Tutorial
MOBOT 2007 Robot Competition
This robot was built for MOBOT 2007, a very difficult
line following competition held every year at Carnegie Mellon University. By documenting this
robot I can at the same time teach you how to build a line following robot.
Without further ado, watch the official competition video! You can find me at 4:17 (count up timer), or 1:01 (count down timer). The loser robot of mine decided to turn around and go back through the start gate . . . lol . . .
So MOBOT is really really hard . . . but me being a bit crazy and only starting a few days before, I decided to accomplish the line following with one photoresistor. Yes, just one! I also decided to use the exact same edge-detecting algorithm as that used on my Stampy robot. I could do the course with a single non-scanning photoresistor, but decided the scanning servo will allow it to work a bit better.
Now for the video on building the robot and various demonstrations on what it can do:
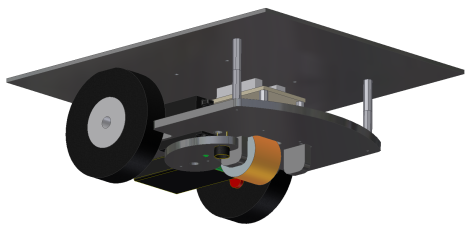
Design in CAD
As usual I always first design my robot in CAD. Below are a few selected
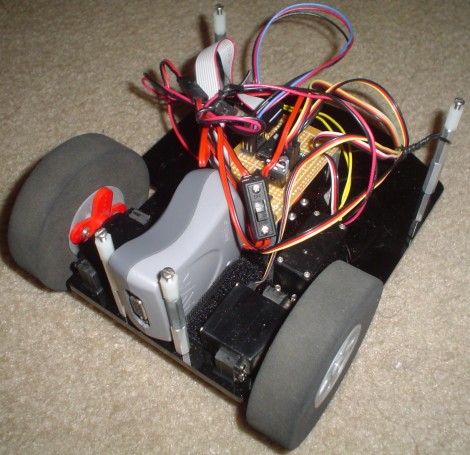
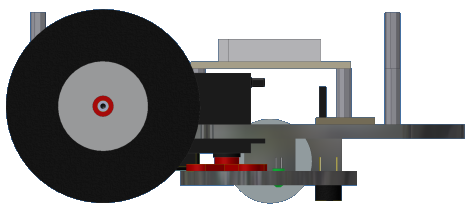
side-by-side comparisons of my CAD images and actual images of the robot.
As you might notice, the CAD images dont take into account the optical distortion
caused by distance from the camera. You will also notice small inaccuracies between
both because I took shortcuts in CAD (functionality over pretty-ness).
Feel free to drag around the CAD file:
You may download the MOBOT 2007 DWF here.
And more images for your viewing pleasure:


In the back you will notice my AVR programmer mounted by use of velcro, wedged right between two long spacers. I left it out of CAD from laziness and last minute planning . . . Also, obviously I didnt CAD in the wiring, but when you CAD, always make sure the wiring fits. Its often a mistake I make . . .
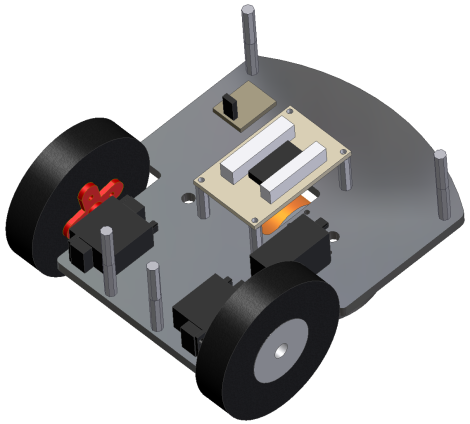
Looking at the side view in CAD was very important. This is how I managed to get the ground height to be perfect.
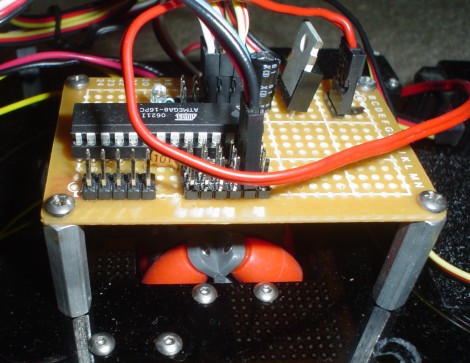
Microcontroller and Source Code
I decided to use the microcontroller I built for
The $50 Robot so that everyone can use
the source code I develop. To mount it onto the robot I used four hex-shaped
spacers. Each spacer has screw threads, and the microcontroller board has
screw holes (this was intentional when I chose this board for the $50 robot)
to make mounting very easy.
I have zipped up my source code for anyone to use and modify here. Remember, please give credit and link back if you use this code! To install and use the code, follow the directions as described in the programming section of The $50 Robot. Just rename the folder and filename to 'Mobot_2007_v1'.
Line Follower Source Code (April 26th, 2007)
Sensor Scanner
First the sensor would scan across the entire field for sensor calibration.
Then, using my Stampy edge-detecting algorithm, the robot was able
to quickly detect the white line without doing wasteful full scan sweeps. The only difference
was that instead of finding an edge determined by distance, it found an edge determined by
color.
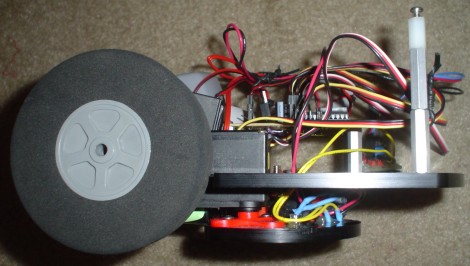
On the bottom of the robot you can see the scanning servo and the color sensor used to detect the line. Wiring was passed through holes I drilled through the base. You can also see the 6V NiMH battery velcroed to the bottom of the robot base. Its ideal to keep the heaviest parts as low to the ground as possible.

In all honesty I'd say this robot wasn't very effective. The scanner was just too slow and inaccurate, and the photoresistor had too slow of a response rate. If I were to do the scanning idea again I would use an infrared emitter/detector sensor instead.
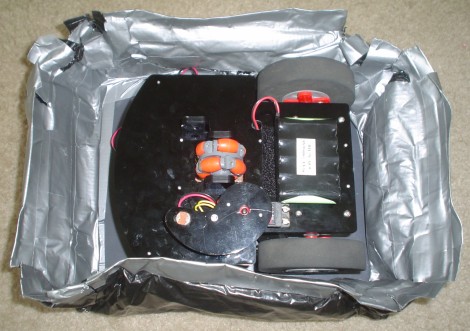
Sun and Rain Shielding
During MOBOT your robot must be able to work rain or shine. This is an umbrella frame I designed to handle both.
For the sides of the umbrella, around the large black plastic sheet mounted on the robot, I duct taped on several layers of garbage bag.
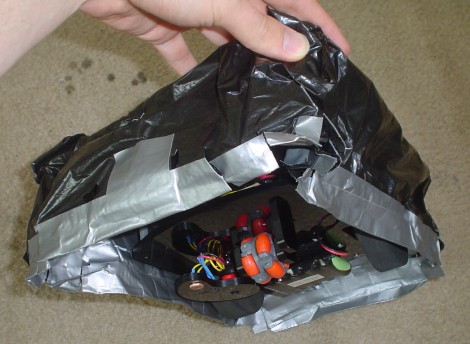
As a stiffener, and to make sure the bags were opaque, I put an additional layer of duct tape on the inside.
Time Spent on This Robot
I don't remember exact hours, but I think it was about 3 for CADing, 10 for manufacture of parts and correcting dumb mistakes,
about 3 hours for coding, and another 10 for testing and debugging. Another 10 hours were spent on filming and documentation.
Thats an estimated 36 hours.
Society of Robots copyright 2005-2014