
 Search Here
MISC
Parts List
Robot Forum
Chat
Member Pages
Axon MCU
Robot Books
Shop
Contact
SKILLS
How To Build
A Robot
Tutorial
Calculators
Mechanics
Programming
Miscellaneous
Robots
Space
HARDWARE
Actuators
Batteries
Electronics
Materials
Microcontrollers
Sensors
SCIENCE
Robot Journals
Robot Theory
Conferences
STEP-BY-STEP ROBOT TUTORIAL
STEP 2: CONSTRUCT THE CHASSIS
Mechanics - Chassis Construction
In step 2 we will build the chassis of our robot. I didn't use CAD or CNC
or a high precision mill. No space-age materials, either. I built this robot
just using stuff I found around the house, using really common tools.
At each step I will offer ideas of other ways to go about making your chassis,
Chassis Optimization
To optimize anything, you must understand it first. I have assembled
a few additional tutorials that are optional reading to help you understand
robotic mechanical design. The first is on
robot chassis construction,
giving key pointers in assembling your robot. The next tutorial is calculating the
robot motor factor, helping
you quantitatively choose robot velocity, the motor torque, and wheel diameter.
If you would like to use or know about more 'professional' materials than just stuff found around the house, have a look at the list of robot materials.
Chassis Construction
We will now construct the chassis, step by step.
When building your robot, use my example as more of a guide - your imagination
is more important. Remember, I just gathered some things I found
in the closet and recycle bin, and used very basic tools. Do the same, and figure
out ways to connect it all together.
Your house has a lot of stuff, be creative!
In total, this took me about one hour of work.
update: Webbot has graciously written up a tutorial on an alternative method to construct your $50 robot.
The first part is to make the wheels. Either take wheels off an old toy, or get a sheet of material such as cardboard or plastic. Try to chose a material that is wide and has high friction. After testing I found that cardboard works fine on carpet, but slips occasionally on wooden floors. You could also double up the material, or wrap a rubber band around the rim for better grip. CD's can make good wheels, too.
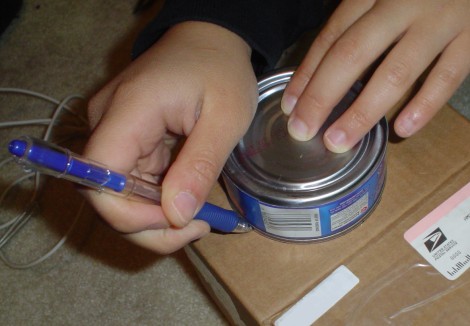
Now find a round object, and with a pen trace the object on the material. I did it the professional way by having my lovely assistant trace a can of tunafish for me (she requested that I point this out). The recommended wheel diameter is about 6", but it doesn't really matter. A larger wheel diameter will allow your robot to go faster and climb bigger objects. We made a second version of wheels later on using a CD to trace the circle - this diameter worked really well.
You can also use the lid of a peanutbutter jar, or use a can of tunafish, as wheels - and wrap rubber bands around them for improved friction.
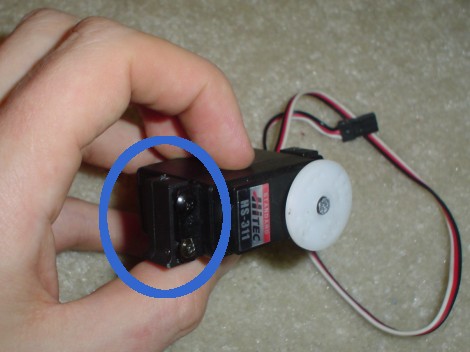
This is a servo. The HS-311 servo is the most basic, and 2nd cheapest servo in the market. You could of course buy the cheapest servo in the market, but its tiny and wont offer much strength to move your robot.
First you must modify your servos so that they can rotate continuously. The factory default will only allow the servo to rotate 180 degrees.
After modifying your servo, in the servo you will see a screw in the horn. Take the screw out.
Warning: The screws on these servos are of low quality.
Use a fine tip screwdriver, and be careful not to strip the screw head.
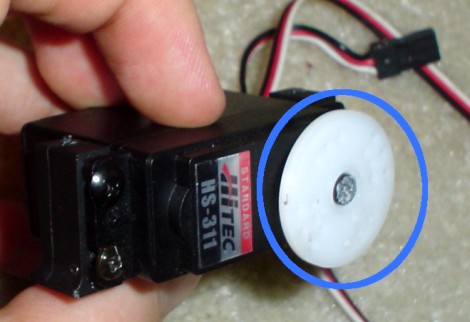
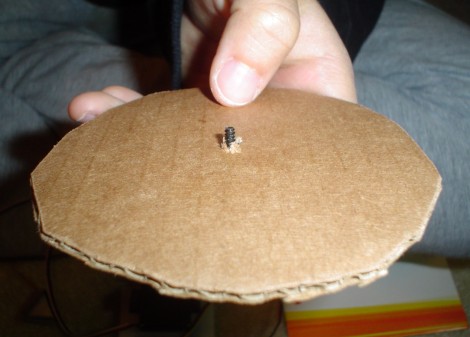
Cut out the traced wheel, and poke a hole into the center using something sharp (a thumbtack would be fine). Stick the servo screw through the center.
After poking the screw through the wheel you will notice some flange material sticking up around it. Cut that off using something sharp, like a razor blade or pointy scissors.
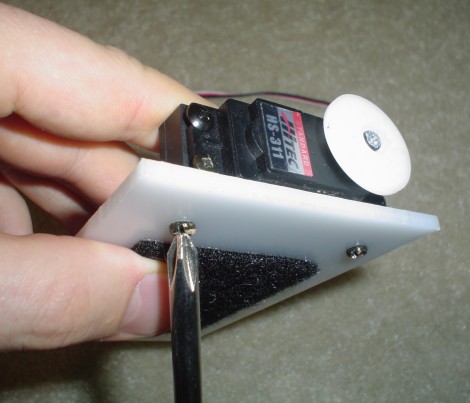
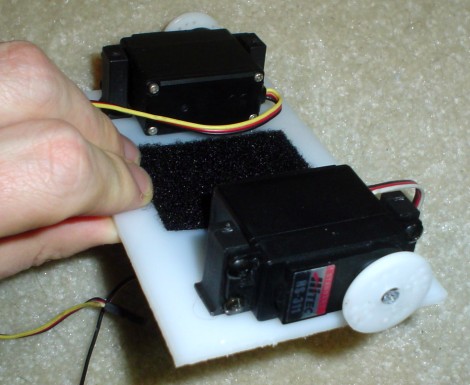
Your servos come with two black box shaped rubber things that have holes in it. They are called servo mounts.
Using the larger screws that come with the servos, attach the servo mounts to both servos.

Now find a piece of rigid cardboard or plastic, and cut it into a rectangle about 3" x 6". Poke 4 holes into it spaced so that the servo mounts can be screwed into it. Use the screws that come with the servos.
I used my favorite type of robot material, HDPE since I had some laying around. But you can use wood or even a cereal box if you wanted. If the material bends too much, duct tape some sticks onto it.
Another method: I didn't try this, but I can imagine just using 'borrowed' restaurant chopsticks and duct tape, using the chopsticks as sort of a wooden frame. Put a chopstick on each corner of the servo, then wrap with the tape. Then connect the other servo in the same manner. Popsicle sticks should work, too . . .
This is a mockup of what I am thinking. The chopsticks will need to be cut in half, and I didn't put tape on it, but you get the idea.

Update: Just two months after I posted the idea, a SoR member tried out the chopstick idea successfully and sent these pics:
"What I did was cut some chopsticks down to about 6 inches, and stuck them through the screw mounts on the side and taped it up. After that, there was enough room to put a piece of cardboard in between, put some Velcro on that, and put a 9 v. on it." - Radiken
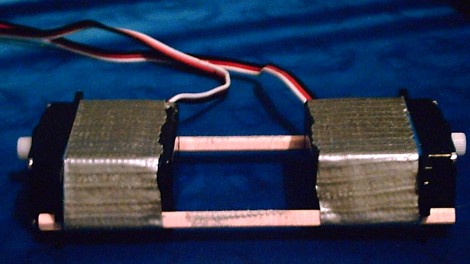
This is what it should now look like. I put some black sticky velcro on the center to attach things, but this is entirely optional and not required for your robot.
Next, place some tape onto your servo horn. I used folded Scotch tape, but I found that double-sided foam tape holds better. What this tape does is holds your wheel to the servo horn to prevent it from spinning independently.
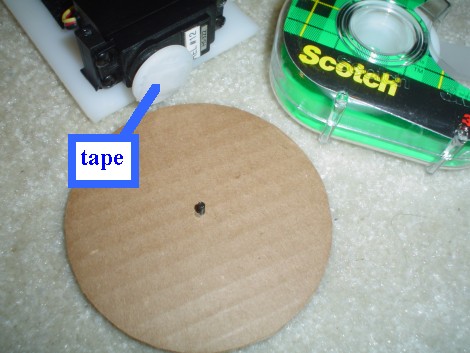
Screw the wheel onto the servo shaft using the screw in the wheel. This is the completed wheel attached to the servo.

There are also better ways to attach wheels to servos.
Now what you need to do is make a castor. This castor is the 3rd point of balance for your robot, and needs to be low friction when sliding across your floor. There are many many ways to do this, but I found this way to work great.
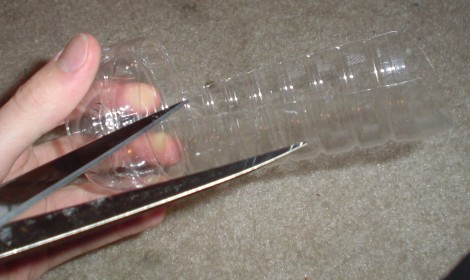
Get a water bottle, and cut off the mouth.

Cut the bottle in half, but leave the bottom fully attached.
Lay the bottle over your robot as so. The bottom of the bottle will contact the ground and be the castor.
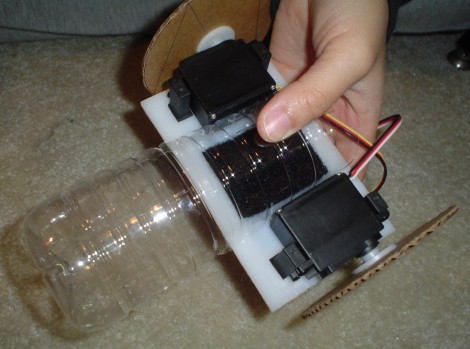
To attach the bottle to the robot I used two rubber bands. These held really well, despite how ghetto it looks. You could also use tape or screws to hold the bottle on.
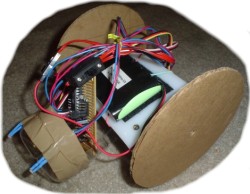
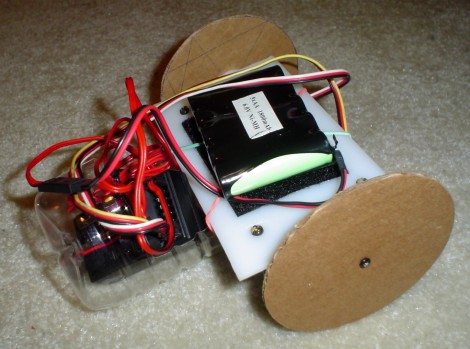
This is what your final robot chassis should sort of look like.

If you went with the chopstick method, you can get two long sticks that jut out from the four on the servos, and stick them into a ping pong ball. The ping pong ball would be the castor.
Optional:
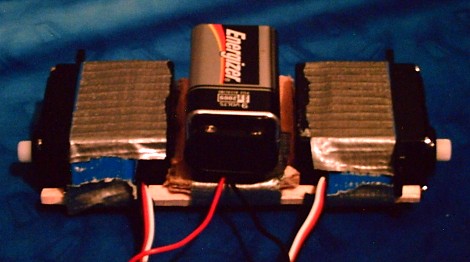
Since I had some basic RC equipment around, I made my robot temporarily remote controlled just for fun. It is a useful method for testing all new robots you build to help you work out the mechanical bugs, and truely see what your robot is capable of. Here is a tutorial on remote control robots.
I attached a battery to the velcro, and put the receiver inside the bottle. Both servos were attached to the receiver.
Bonus Video!
Just for fun I decided to have a battle between the $50 Dollar Robot (remote control mode)
and Stampy. Ok so it got the crap beaten out of it, but it held up
and didnt break!
(the song used is
'Trip Like I Do' by Filter and Crystal Method
)
Now that you have built the chassis for your robot,
lets continue on to Step 3A: Robot Electronics >>>.
Society of Robots copyright 2005-2014