
 Search Here
MISC
Parts List
Robot Forum
Chat
Member Pages
Axon MCU
Robot Books
Shop
Contact
SKILLS
How To Build
A Robot
Tutorial
Calculators
Mechanics
Programming
Miscellaneous
Robots
Space
HARDWARE
Actuators
Batteries
Electronics
Materials
Microcontrollers
Sensors
SCIENCE
Robot Journals
Robot Theory
Conferences
|
|
||||
This robot tutorial should help you with the mechanical aspect of building your very first robot. You should have already read my build your first robot tutorial before moving on to this tutorial.
Planning. Would you say someone who plans his future will have a better future? YES!
I cannot emphasize any more for you to design your robot out on paper (or computer) first. This means plan
out everything, such as what material to build your robot out of<, where
to put every screw, how you will attach your sensors - EVERYTHING. You will save money and time,
and will have a better constructed robot too. To do this, you should draw all your parts out to
dimension, mark your holes, and understand how all your parts connect.
Use fewer and simpler parts! You will probably quickly realize that the fewer
parts your robot has, and the simpler they are, the less you will have to design,
make, and pay for. As you design your parts, always consider how you will actually manufacture these parts.
Don't use unneccessary or over complicated features, or designs you do not have the tools to make or are really hard to make.
Fewer and simpler parts also mean a smaller chance for mistakes in your design. K.I.S.S.
Use off-the-shelf parts. When you purchase a part, it costs money. However there is a
good chance that the off-the-shelf part is better than anything you can design and build yourself.
Off-the-shelf parts are already well engineered, designed, and tested. This means there is less likely to
go wrong on your robot, and less time and effort you need to spend to finish it. How much is your time worth?
No point in spending 20 hours making a ghetto circuit when you could buy a high quality one for just $20.
Ask yourself if the price of a part is greater or less than your willingness and ability to make the part yourself.
Do not use more than 2 or 3 different screw types.
There was a robot I once had to work on that another engineer built. He used a
different screw type for every part! I had to use like 10 different unlabeled hex wrenches and 2 different screwdrivers
to assembly/dissasemble it. Even worse, he had to purchase 10+ different boxes of screws! If you can
make your entire robot out of only the very common 4-40 screws, you are on the right track.
Frame
Materials
Mounting
Wheel texture. The texture of your wheel is very terrain dependent. A common mistake for beginners is to
ignore the texture of the wheel. If your wheel is too smooth then it will not have much friction.
This is a serious issue with omni-wheels. An all plastic omni-wheel works poorly compared to
an omni-wheel that uses rubber for the side wheels. Overly smooth robot
wheels would likely skid while accelerating and braking.
However a wheel that is really rough, such as a foam wheel, has higher friction with the ground
leading to innefficiency. You also need to consider wear and tear on the wheel.
Wheel width. You do not want it too wide as it causes increased resistance to rotating
the wheel on a surface. I once used a 1" foam wheel on a concrete surface and it was very poor at rotating.
Wheel center hole diameter. This is where you would actually mount the output
motor shaft to your motor. So you must know the length and diameter of your motor output shaft
so that you may put this shaft into the hole of your motor.
Mounting Your Robot Wheel Techniques
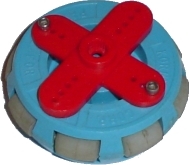
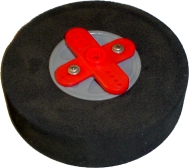
Servo Wheel Mounting. Mounting a wheel onto a servo is fairly easy, and only requires a little
drilling. When you purchase a servo, you also get a bunch of other little goodies with it. One of the items
is called a servo horn. This is usually a black/red circular, X shaped, or I shaped plastic piece that
attaches to the output shaft of the servo. So what you do is attach the wheel to this servo horn, then
just screw the servo horn as designed into the servo. In the images below, I drilled two holes into
my wheel, 2 holes into the servo horn (the red X thing), and screwed 2 screws into it to hold them together.
Then I just attached the servo horn to my servo output shaft with a 3rd screw.
This servo wheel mounting method, with slight modification, can work for other motors too. Just
make your own custom 'servo horn' with a custom hole designed to fit your motor output shaft.
Purchasing Wheels
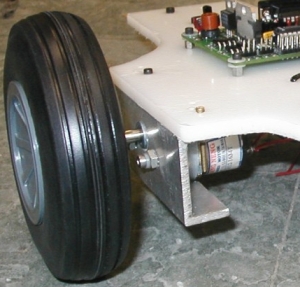
Motor Mounting
And the completed mounted servo and wheel configuration . . .
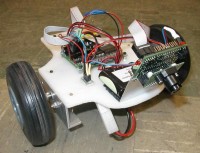
Things to keep in mind when mounting your electronics . . . Keep your electronics high up on your robot.
It probably weighs little, so you want the heavier items using the space closer to the ground.
You want to keep it out of splashing dirt too. Also keep in mind you probably want certain sensors and
other sensitive electronics to stay away from your motors as electronic noise could cause interference.
Lastly, plan out your wiring on your chassis - have routing holes drilled through your chassis beforehand, for example.
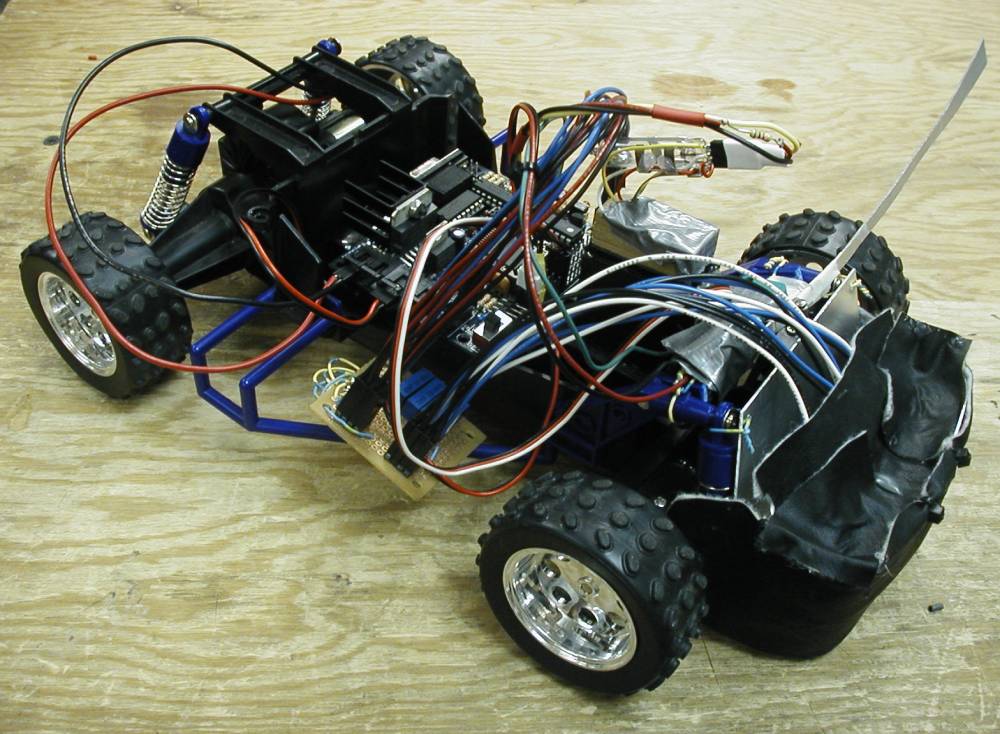
Here (click to enlarge) you see a homemade aluminum mount for a sonar transducer
and another mount on a servo for two Sharp IR Rangefinders.
The sonar mount is aluminum bent at 90 degrees with a few screw holes drilled into it,
and plastic spacers to prevent any shorting of the circuit board with the aluminum. The IR Rangefinder
mount is aluminum with double sided sticky tape holding the sensors onto the aluminum plate.
Design
When I first started building my first robot, someone much more experienced than me once said paraphrased,
"if you build a mechanically crappy robot with expert programming and control, you will only get a crappy robot;
build a mechanically professional robot with crappy programming and control, you will still get a well built
robot." Its very good advice which I still use today.

The frame of your robot is the basic structure to which you attach everything else. It is probably the largest
part of your robot, so make sure it is made of a light weight rigid material such as
aluminum or HDPE. I recommend reading
those tutorials as well.
If you are like how I was my first 3 years of building robots, you are probably super cheap and incredibly poor.
Robot parts are expensive. Don't even pretend you can make a robot out of parts just lying around your house.
Check out my tutorial on funding your robot. To summarize, expect to spend
about $10-$50 per robot motor, about $20 on frame material,
wheels about $8, and about $10 on miscellaneous nuts and bolts. You
can try to search garbage bins and other old stuff for this, but you may or not be lucky. You might be able
to find a few reasonable good motors, but it might be much harder to find two of the same motors. Just don't build
a crappy robot because cereal box cardboard is the only material you can find!
When a beginner asks 'how do I attach my robot part?' what they are really asking is 'what
is the best way to mount this part?'. Every part on a robot has a different method of mounting.
This is due to obvious constraints such as placement, weight, size, function, etc. So I will go over
each of the parts you may want to mount and tell you one or two of the best ways to do this.

Wheel Basics
Wheel diameter. When buying (or making) your wheels you want to put your motor into consideration. For a start,
there is torque and velocity. Large diameter wheels give your robot low torque but high velocity. So if
you already have a very strong motor, then you can use wheels with larger diameters.
Servo's already have good torque, so you
should use larger diameter wheels. But if your
motor is weak (such as if it does not have any gearing), you want to use a much smaller diameter
wheel. This will make your robot slower, but at least it has enough torque to go up a hill!
Another dumb mistake someone can make is buying a wheel that has a diameter close to or less than
the motor diameter. For example, if you have a 1" diameter motor, and a 1.5" diameter wheel, you have a
.25" ground clearance ( (1.5"-1")/2=.25" ). How high is the tallest object you want to go over?
Jamming. Lets start with a basic wheel attached to a basic motor. If the wheel does not have a center hole,
just drill one out slightly smaller than the diameter of the shaft of your motor.
Make sure the hole is perfectly centered!!!! Then you can
fill the hole with a little superglue, and finally press fit (jam, if you will) the motor
shaft into the wheel. Perhaps use a little more superglue around the edges.
The best robot wheels are actually hobby RC aircraft wheels. Strange, huh? Anyway, there is a huge
variety of them online for you to choose from. Just go to any RC hobby website. For example,
I have bought several wheels from this
online RC hobby store.
Motors
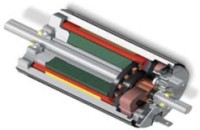
There are huge varieties in motors. But for your robot I will assume you are using a basic
DC motor. Make sure you get a motor which already has
a gear box attached, as it makes your robot much better controlled, more efficient, and stronger. Designing your
own gearing and/or chain systems can and will cause you headaches. My first attempt at it
was a miserable failure . . . I recommend against trying it.
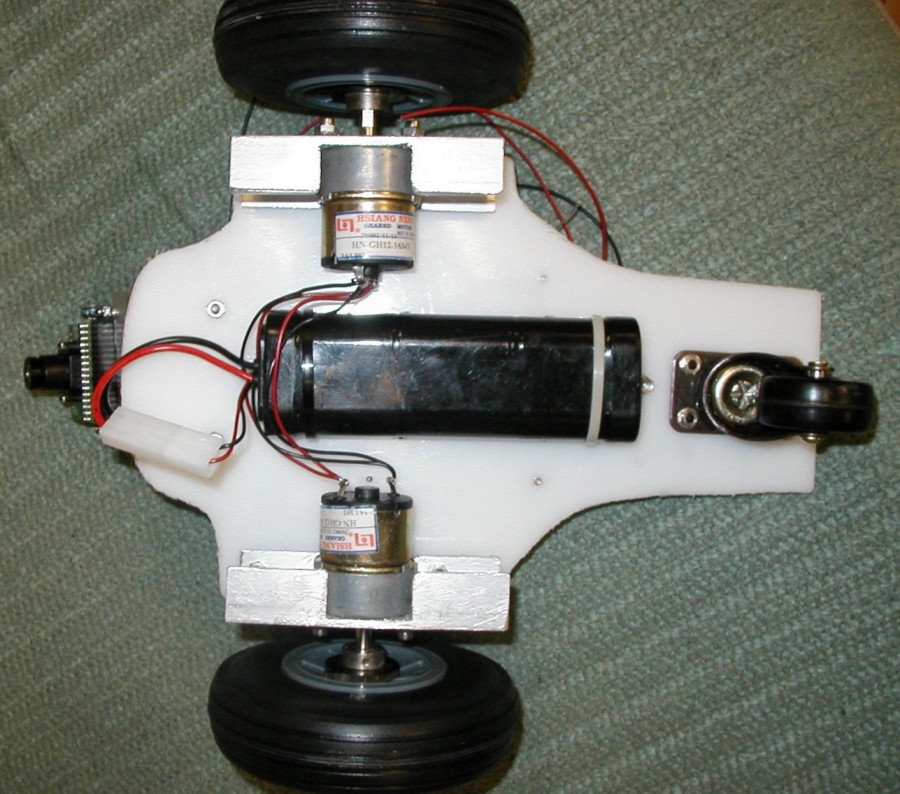
To mount any type of motor to your chassis you will need to use an L shaped bracket.
For a DC motor, all you need to do is take a sheet of aluminum, drill two holes in two of the corners,
drill two more holes on the other half to match the motor screw holes, then bend the entire piece in a 90
degree angle. This particular image I had found a U shaped piece of aluminum in some bin, I cut it to size,
and just drilled the appropriate holes to attach it to my white HDPE chassis.
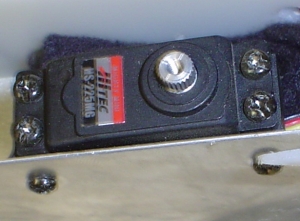
Servo Mounting
To mount your servo to your chassis, once again you will use the little baggie of goodies
that came with the servo. You should have two black cube looking things with holes in it.
There will be three holes in front and a single hole on the bottom.
Your servo should also have four mounting holes, two on each side.
Using screws, attach the front of the black things to each side of the servo.
As shown in the image below, then attach your robot base with two more screws to the
bottom hole of the black thingies. This particular robot used a thin reinforced sheet of
aluminum as the base with two drilled holes for the mounting screws.

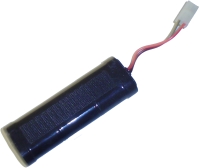
Mounting Robot Batteries
Mounting your batteries is very simple. As long as you are using an
RC battery pack (such as NiCad or NiMH, you can simply mount your batteries
to your robot using strips of velcro. This is the velcro
that has a sticky tape side and a velcro side. The advantage to this mounting method is that
you can easily swap out your batteries for freshly charged ones - great if you are in a
robot competition.
You can also group multiple batteries together using zip ties. This is an example of a velcro strip
taped to a NiCad battery pack:
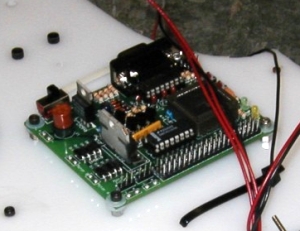
Electronics
Mounting your electronics to your robot can potentially be tricky. If you're lucky, your
microcontroller has holes for screws or something
other method of mounting. For this Cerebellum microcontroller (pictured below) I drilled holes into
my HDPE robot base, then screwed short metal spacers into the HDPE. Then all I had to do is put
my screws through the Cerebellum screw holes and screw them into the spacers.
Mounting Sensors
Mounting sensors is very much a case-by-case basis. What makes mounting sensors difficult is that
you are very limited on where you can place them onto your robot. They must be away from noisy
motors, and probably at the front/sides of your robot. You must also keep them protected so that
collisions and dirt wont damage your sensors too. If your robot is a line follower, you
have to keep your sensors at an exact distance from the ground or risk bad data - even when the ground is uneven!
If you are lucky, your sensor has screw holes in just the right place at just the right angle.
But in my experience this is very unlikely.
Unfortunately I have not yet mastered the art of mounting sensors (because
of the huge variety of them), but I can go over a few tricks. So you must get creative, build a
mount, use a little glue . . . you get the picture.

Society of Robots copyright 2005-2014